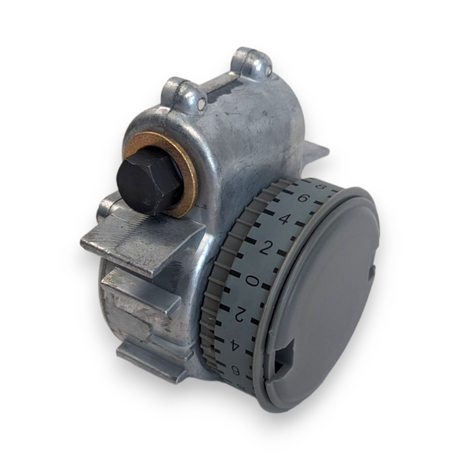
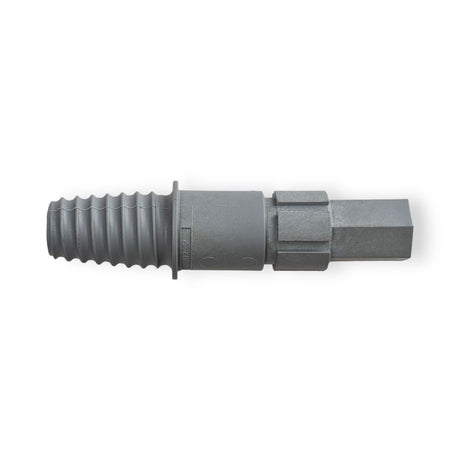
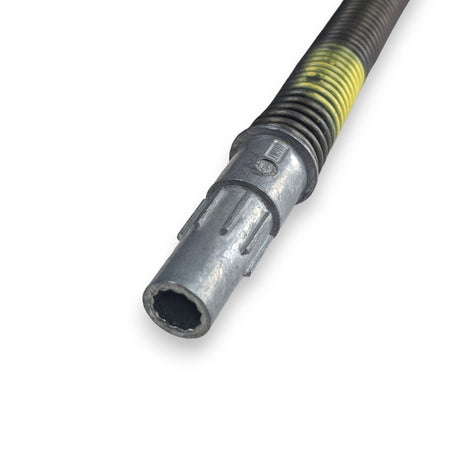
![Single TorqueMaster Original Spring Winding End, Right Hand Side is Gray, Circular]()
![Single TorqueMaster Original Spring Winding End, Right Hand Side is Gray, Circular]()
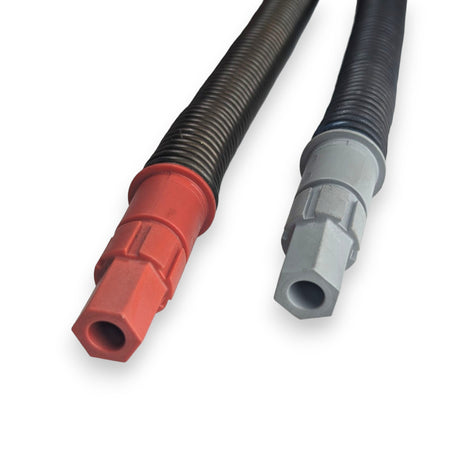
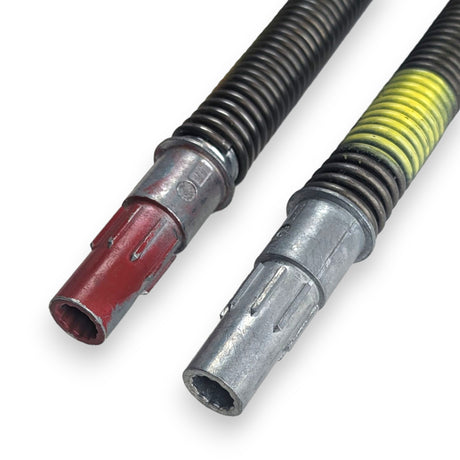
![Pair of TorqueMaster Original Spring Winding Ends, Left Hand is Red, Right Hand is Gray, Circular]()
![Single TorqueMaster Original Spring Winding End, Right Hand Side is Gray, Circular]()
![Pair of TorqueMaster Original Spring Winding Ends, Left Hand is Red, Right Hand is Gray, Circular]()
![Single TorqueMaster Original Spring Winding End, Right Hand Side is Gray, Circular]()
![Pair of TorqueMaster Original Spring Winding Ends, Left Hand is Red, Right Hand is Gray, Circular]()
![Single TorqueMaster Original Spring Winding End, Right Hand Side is Gray, Circular]()
![Pair of TorqueMaster Original Spring Winding Ends, Left Hand is Red, Right Hand is Gray, Circular]()
![Single TorqueMaster Original Spring Winding End, Right Hand Side is Gray, Circular]()
![Pair of TorqueMaster Original Spring Winding Ends, Left Hand is Red, Right Hand is Gray, Circular]()
![Pair of TorqueMaster Original Spring Winding Ends, Left Hand is Red, Right Hand is Gray, Circular]()
![Pair of TorqueMaster Original Spring Winding Ends, Left Hand is Red, Right Hand is Gray, Circular]()
![Pair of TorqueMaster Original Spring Winding Ends, Left Hand is Red, Right Hand is Gray, Circular]()
![Pair of TorqueMaster Original Spring Winding Ends, Left Hand is Red, Right Hand is Gray, Circular]()
![Pair of TorqueMaster Original Spring Winding Ends, Left Hand is Red, Right Hand is Gray, Circular]()
![Pair of TorqueMaster Original Spring Winding Ends, Left Hand is Red, Right Hand is Gray, Circular]()
![Pair of TorqueMaster Original Spring Winding Ends, Left Hand is Red, Right Hand is Gray, Circular]()
![Pair of TorqueMaster Original Spring Winding Ends, Left Hand is Red, Right Hand is Gray, Circular]()
![Pair of TorqueMaster Original Spring Winding Ends, Left Hand is Red, Right Hand is Gray, Circular]()
![Pair of TorqueMaster Original Spring Winding Ends, Left Hand is Red, Right Hand is Gray, Circular]()
![Pair of TorqueMaster Original Spring Winding Ends, Left Hand is Red, Right Hand is Gray, Circular]()
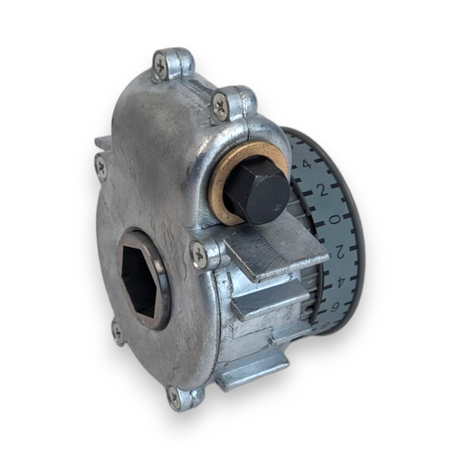
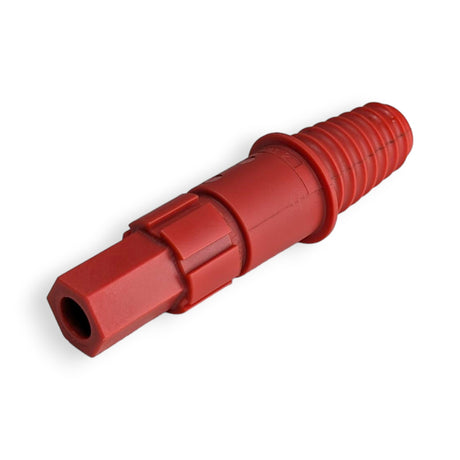
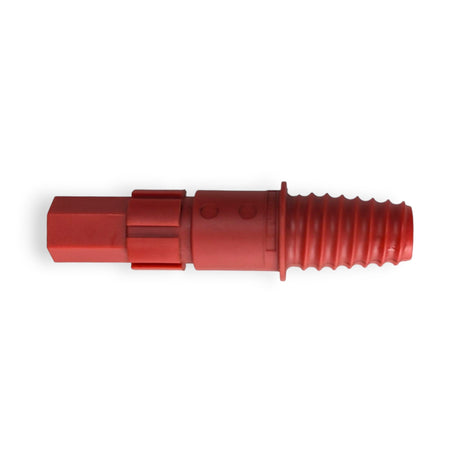
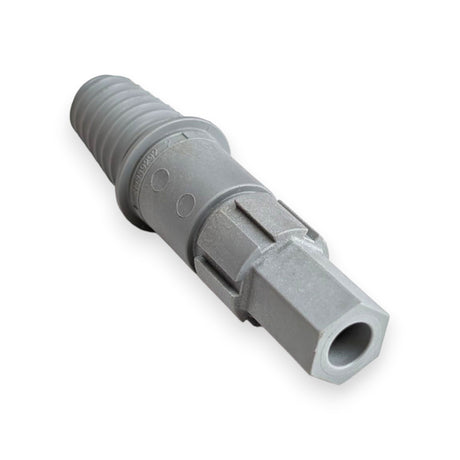
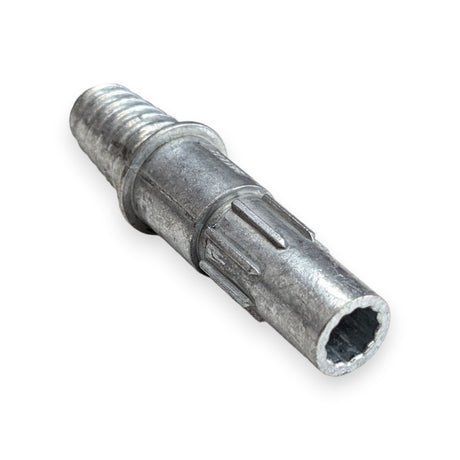
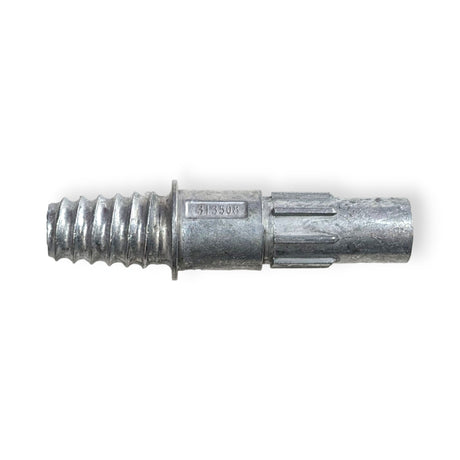
![Single TorqueMaster Plus Spring Winding End, Right Hand Side is Gray, Hexagonal]()
![Single TorqueMaster Plus Spring Winding End, Right Hand Side is Gray, Hexagonal]()
![Single TorqueMaster Plus Spring Winding End, Right Hand Side is Gray, Hexagonal]()
![Pair of TorqueMaster Plus Spring Winding Ends, Left Hand is Red, Right Hand is Gray, Hexagonal]()
![Single TorqueMaster Plus Spring Winding End, Right Hand Side is Gray, Hexagonal]()
![Pair of TorqueMaster Plus Spring Winding Ends, Left Hand is Red, Right Hand is Gray, Hexagonal]()
![Single TorqueMaster Plus Spring Winding End, Right Hand Side is Gray, Hexagonal]()
![Pair of TorqueMaster Plus Spring Winding Ends, Left Hand is Red, Right Hand is Gray, Hexagonal]()
![Single TorqueMaster Plus Spring Winding End, Right Hand Side is Gray, Hexagonal]()
![Pair of TorqueMaster Plus Spring Winding Ends, Left Hand is Red, Right Hand is Gray, Hexagonal]()
![Pair of TorqueMaster Plus Spring Winding Ends, Left Hand is Red, Right Hand is Gray, Hexagonal]()
![Pair of TorqueMaster Plus Spring Winding Ends, Left Hand is Red, Right Hand is Gray, Hexagonal]()
![Pair of TorqueMaster Plus Spring Winding Ends, Left Hand is Red, Right Hand is Gray, Hexagonal]()
![Pair of TorqueMaster Plus Spring Winding Ends, Left Hand is Red, Right Hand is Gray, Hexagonal]()
![Pair of TorqueMaster Plus Spring Winding Ends, Left Hand is Red, Right Hand is Gray, Hexagonal]()
![Pair of TorqueMaster Plus Spring Winding Ends, Left Hand is Red, Right Hand is Gray, Hexagonal]()
![Pair of TorqueMaster Plus Spring Winding Ends, Left Hand is Red, Right Hand is Gray, Hexagonal]()
![Pair of TorqueMaster Plus Spring Winding Ends, Left Hand is Red, Right Hand is Gray, Hexagonal]()
![Pair of TorqueMaster Plus Spring Winding Ends, Left Hand is Red, Right Hand is Gray, Hexagonal]()
![Pair of TorqueMaster Plus Spring Winding Ends, Left Hand is Red, Right Hand is Gray, Hexagonal]()
![Pair of TorqueMaster Plus Spring Winding Ends, Left Hand is Red, Right Hand is Gray, Hexagonal]()
![Pair of TorqueMaster Plus Spring Winding Ends, Left Hand is Red, Right Hand is Gray, Hexagonal]()
![Pair of TorqueMaster Plus Spring Winding Ends, Left Hand is Red, Right Hand is Gray, Hexagonal]()
![Pair of TorqueMaster Plus Spring Winding Ends, Left Hand is Red, Right Hand is Gray, Hexagonal]()
![Pair of TorqueMaster Plus Spring Winding Ends, Left Hand is Red, Right Hand is Gray, Hexagonal]()
![Pair of TorqueMaster Plus Spring Winding Ends, Left Hand is Red, Right Hand is Gray, Hexagonal]()
![Pair of TorqueMaster Plus Spring Winding Ends, Left Hand is Red, Right Hand is Gray, Hexagonal]()
![Pair of TorqueMaster Plus Spring Winding Ends, Left Hand is Red, Right Hand is Gray, Hexagonal]() Up to 59% off
Up to 59% offWayne Dalton
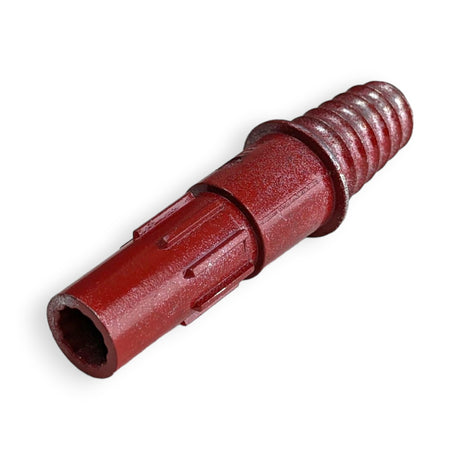
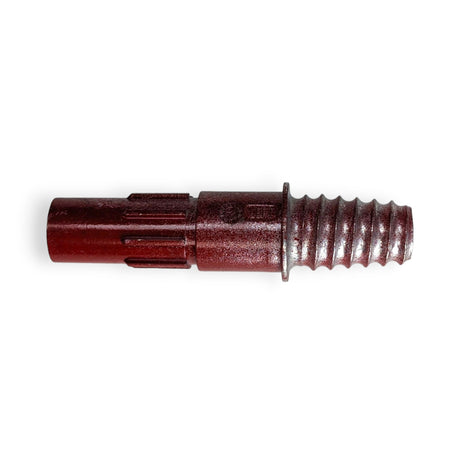
Wayne Dalton TorqueMaster Replacement Spring
From $44.97$109.99Unit price /Unavailable-
-
-
-
-
-
-
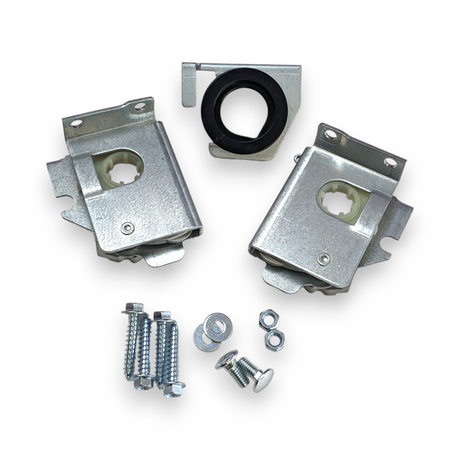
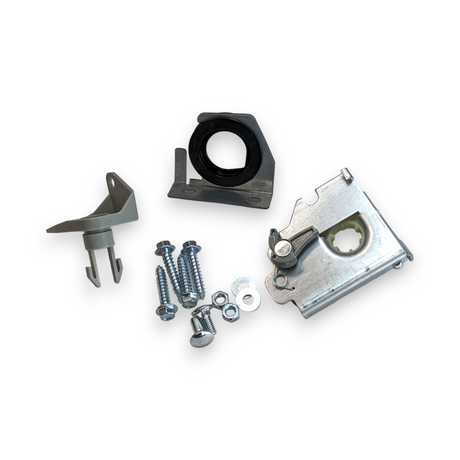
![TorqueMaster Upgrade Kit | Single Spring]()
![TorqueMaster Upgrade Kit | Single Spring]()
![TorqueMaster Upgrade Kit | Single Spring]()
![TorqueMaster Upgrade Kit | Single Spring]()
![TorqueMaster Upgrade Kit | Single Spring]()
![TorqueMaster Upgrade Kit | Single Spring]()
-
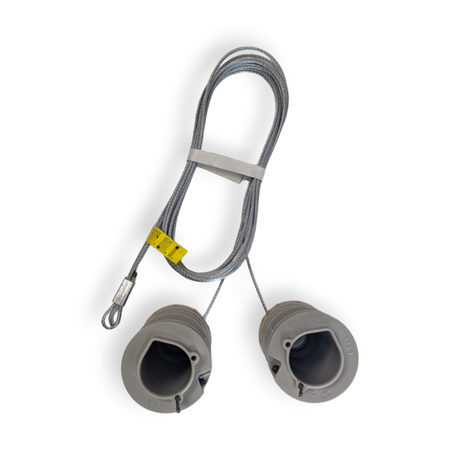
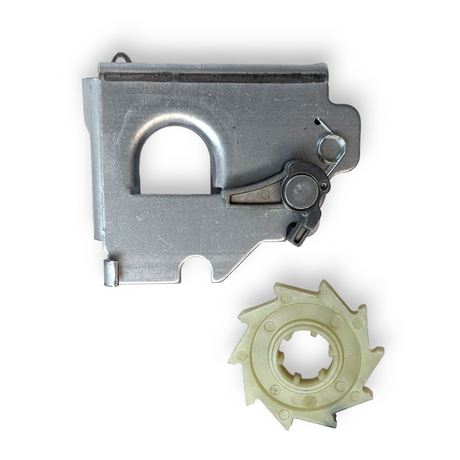
![TorqueMaster Upgrade Kit | Double Spring System]()
![TorqueMaster Upgrade Kit | Double Spring System]()
![TorqueMaster Upgrade Kit | Double Spring System]()
![TorqueMaster Upgrade Kit | Double Spring System]()
![TorqueMaster Upgrade Kit | Double Spring System]()
![TorqueMaster Upgrade Kit | Double Spring System]()
![TorqueMaster Upgrade Kit | Double Spring System]()
![TorqueMaster Upgrade Kit | Double Spring System]()
![TorqueMaster Upgrade Kit | Double Spring System]()
![TorqueMaster Upgrade Kit | Double Spring System]()
![TorqueMaster Upgrade Kit | Double Spring System]()
![TorqueMaster Upgrade Kit | Double Spring System]()
![TorqueMaster Upgrade Kit | Double Spring System]()
![TorqueMaster Upgrade Kit | Double Spring System]()
![TorqueMaster Upgrade Kit | Double Spring System]()
![TorqueMaster Upgrade Kit | Double Spring System]()
![TorqueMaster Upgrade Kit | Double Spring System]()
![TorqueMaster Upgrade Kit | Double Spring System]()
![TorqueMaster Upgrade Kit | Double Spring System]()
![TorqueMaster Upgrade Kit | Double Spring System]()
![TorqueMaster Upgrade Kit | Double Spring System]()
![TorqueMaster Upgrade Kit | Double Spring System]()
-
-
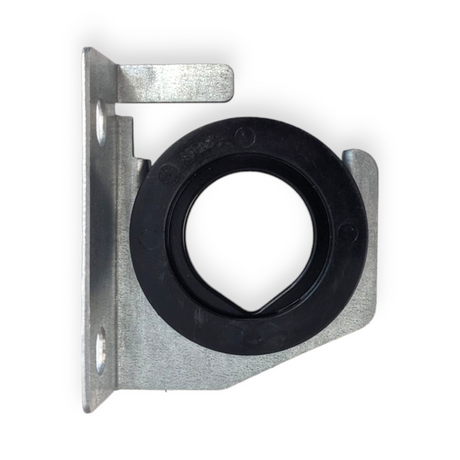
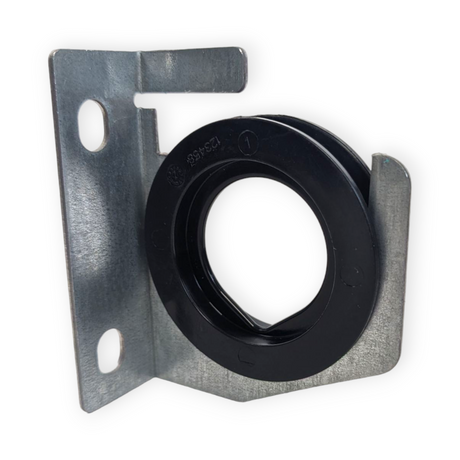
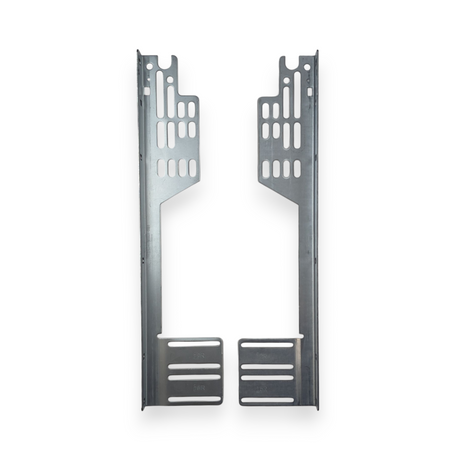
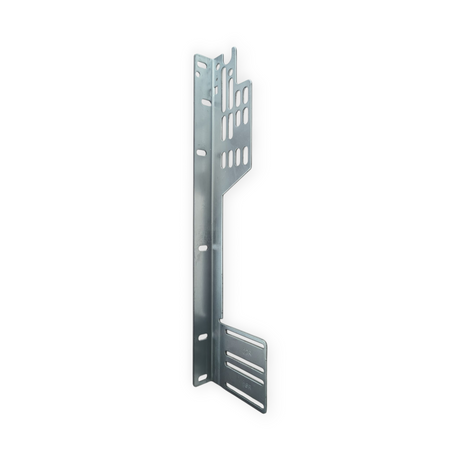
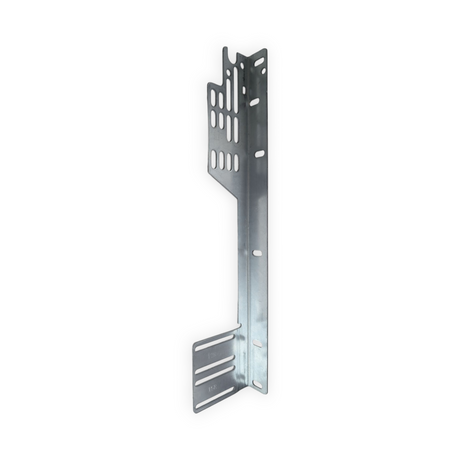
![Flag Angle Bracket | 411534]()
![Flag Angle Bracket | 411534]()
-
-


Wayne Dalton
Wayne Dalton TorqueMaster Replacement Spring